It has been just ages since i last wrote, and for that, i apologize.
There has been a lot happening at the Coupon household, I have since quite my job at Michael's and we found out a couple months ago that another little Couponer is making his or her way to our house come October! So since i am officially a SAHM again, i will be picking up on my blogging again
I cannot wait to share all of my deals and ideas with you again!
Monday, April 2, 2012
Tuesday, September 27, 2011
Hand-Made Christmas: Printed Candles
Hello my lovelies!
I'm so sorry my posting has been so sporadic as of late, life is marching on and I'm running behind it, out of breath yelling "waaaiiitttt!!" After you finish giggling uncontrollably at that mental image, read on to learn how to create your very own stamped candles!


I'm so sorry my posting has been so sporadic as of late, life is marching on and I'm running behind it, out of breath yelling "waaaiiitttt!!" After you finish giggling uncontrollably at that mental image, read on to learn how to create your very own stamped candles!

I based my candles off of the tutorial above(Hint: clicking the picture will bring you to the tute) But, as with everything, i just HAD to make mine a bit differently (lol).
So here's the DIY Printed Candles: The Coupon Way:
What you will need:
- Candles (any size or color will work, just be sure to pick ink color and stamp size accordingly)
- Pigment Ink pad (the original tute will tell you to use the washable,non-pigment ink for health reasons, but i chose to use the pigment ink. It is your choice)
- Rubber or Acrylic Stamps

- Pick out your candle color and size, your stamps and your inks

2. Lay stamp with rubber side up, and pat your ink pad onto the stamp until the whole stamp is covered in ink(you don't need a ton of ink, just enough to lightly cover the stamp)

3. With firm even pressure, carefully roll the candle across the inked stamp. Try to roll the candle in a even, straight line so that the image lines up on all sides.
4. Set your candles aside to cure for 24hrs.
5. Admire your handy work and give them to others to enjoy!

Price Break down:
Set of 6 votives : 2.49
Ink pad: 1.00
Stamps 2 @ .75 and one on hand : 1.50
Total: 4.99 ( that's .83 a candle)
*These could be made for cheaper or for free if you have all of these supplies on hand
Did you decide to give these a try? How did they come out? Share your handy work! Comment below or email me at Sararwenzel@aim.com!
Wednesday, September 7, 2011
Time
This isn't one of my amazingly crafty,thrifty and purely awesome posts that i usually come out with. (i swear, im not that conceited,lol) This blog post would fall under the "general musings" category.
Before you have children, people tell you how fast they grow, how quickly time passes and you nod your head and smile politely, but you don't really know what they mean until you have children yourself.
Baby Coupon is almost 19 months now and it seems like just yesterday i found out i was pregnant with her. It is truly amazing how fast they grow. One minute, you have a cute,squishy little human sleeping peacefully in your arms and then in the next blink they are running around your house with your bra on their head yelling "i mama! I mama!" I am not one of "those" mom's who cry and carry on when their child grows into the next size of clothing, or when they move from a bottle to a sippy cup. But, every once and a while i wish i could freeze the moment i just had with my daughter, make it linger just a little longer. Her sweet laughter and innocent mischief are soon going to give way to quick, excited good-byes as she hurries off to see her school friends.
As much as i want her to grow and flourish, i also want her to slow down, just a bit. I want to make her freeze in time so that i can enjoy her as she is now, for just a little bit longer. We all know that's not going to happen, we all know that before we know it, our "babies" will be graduating college and soon having babies of their own. . . . But, one can wish. And that's what I'm doing with this blog post, wishing a little, and grieving the passing of time, just a little.. . :)
Tuesday, August 30, 2011
Dress-up for Less. A DIY Tiara and Wand Tute
My little girl is just barley 18 months old and already loving to dress up and pretend she's a princess.(groan) Along with this phase comes the need for a tiara and matching wand/scepter, of course! We had a cheapo set in the back of a closet somewhere that i had bought as a gift and had never given, so i gave them to her to play with and this was the result:


She LOVED them. So much so,in fact, that she wore them for an hour each time she played with them and would stop to admire the fluff on the crown. Unfortunately, because they were a dollar-store special, they broke after two days of toddler-love. And so, that brings me to the subject of this post.
Since Baby Coupon loved these dress up items SO much, i decided to make her, her own, toddler-proof set. Luckily, everything i needed i had on hand and was able to create a matching tiara and wand set in the time it took her to take a nap :)
And since i believe sharing is caring, here's a tute(of sorts)
What you will need:
For the tiara/crown:
- Headband that fits your child's head
- Ribbon
- Hot glue
- Jewels of your choice(i used clear rhinestones,because that is what i had on hand)
For the wand/scepter
- 10" long wooden dowel
- ribbon matching the ribbon you are using for the crown
- hot glue
- ribbon(coordinating colors)
- Jewels
- Cover your headband in the ribbon of your choice(if you already like the color of your headband, you can skip this step) For my headband, it was pink, so i covered it in a 1" wide green patterned ribbon.

2. Cut you accessory ribbon down into 6, 5" strips for the large loops, and into 6, 3" strips for the small loops.
3. Make a loop with a 5" strip of ribbon and glue onto your headband

4. Continue like this all the way around the front of the headband until you have used all of your 5" strips of ribbon.

5. Make a loop with your 3" strip of ribbon and glue into place in between the larger loops(see photo below)

6. Glue your jewels around the base of the headband .

7.Put it on your princess and "ooh" and "aw" :)

To make the wand/scepter:(sorry, no step by step pics for the wand)
- Measure out a piece of your 1" wide ribbon the length of your wooden dowel(mine was 10")
- Place a thin line of glue along the length of the dowel on one side
- Fold ribbon over, adhering it onto the dowel
- Place another thin line of glue, this time on the opposite side of the last line of glue
- Fold ribbon over so the the dowel is no longer visible
- Gather your coordinating ribbons, cut at different lengths.
- Place a dot of glue on the end of the dowel, and adhere a piece of ribbon to the top of the dowel
- Repeat , alternating directions of the ribbon, until finished
- After you have adhered all of your ribbon pieces, put another dot of glue at the top of the dowel(now covered in ribbon) and adhere a jewel.
- If you would like your wand to have a bit more sparkle, adhere different sizes and shapes
TADA!!


Now you have successfully made your little one a one-of-a kind tiara and wand set.
Did you decide to make your daughter one of these sets? Show and tell please!! Comment or shoot me an email at Sarawenzel59@gmail.com
Friday, August 26, 2011
Sure! Why Not?!?
So! As you all know, i am now a working mama. And that alone has my plate over-filled with things to do, people to see and babies to snuggle. . . . Apparently, that was not enough for me (lol). In addition to being an ever-trusty cashier, i am now also the new scrapbooking instructor at Michaels in Avon,MA!
Unfortunately, a teacher is only as good as her students. . . and right now I'm no good since i have a total of zero students. That's where you come in my lovely readers!!
Whether you are just starting to venture into the scrap booking world or have been scrap booking for years; we have something for everyone. My first class is Martha Stewart's "Punch Around the Page" The class fee is only $10,plus cost of supplies(but you get a 10% discount of f the cost of your supplies if you show us your class registration at check out). In this class you will learn how to: Create a four-sided border, Layer punched elements and much more!
This class is a one-time, 2hr long class on Friday,September 2nd, from 6p-8p.
If this sounds like something you would like to attend, come on down to Michael's in Avon and sign up!
Thursday, August 25, 2011
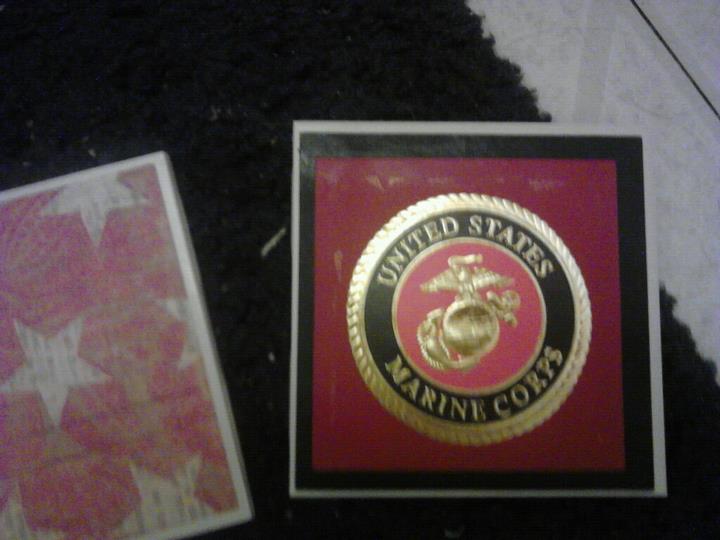
Hand-made Christmas: Tile Coasters
Have you ever gone to the store to buy something, and then not end up buying it because the cost was just outrageous? That is the feeling i used to have about coasters; but not anymore! I stumbled upon a tutorial for ceramic-tile coasters here via Pinterest(LOVE this website!) I followed the basic instructions but changed a few things, so here is my version of the tile coasters:
You will need:
6 white 4" ceramic tiles(.16 at Home Depot)
2-3 sheets of 12x12 Scrapbook paper of your choice
Home made modge podge*
Scrapbook stickers(these are optional and add a little bit to the final cost, but i decided to use them to make my coasters even more special to the person they are for)
Felt/silicone furniture pads(the silicone ones are called "bumpers" for some reason) 1/2" diameter
Acrylic sealant spray
Paper cutter
paintbrush
Cut your scrapbook paper down to size. If you have a Cricut, i suggest using that since it makes this step much quicker, but a good 'ole trusty paper cutter will do the trick if you don't have a cricut.
After the paper is cut down to size, line up your tiles.
Spread a thin layer of your "modge podge" on the tile first, carefully lay your scrapbook paper onto the tile and carefully smooth out any air bubbles. Spread another thin layer on top of the scrapbook paper, set aside to dry.
Repeat until all of your tiles are covered with the paper.
If you are using stickers, place the sicker where you want it on the tile, cover in a thing layer of "modge podge" and set aside.
Put 2 or 3 three more coats of "modge podge" on each tile, letting them dry fully before applying the next coat.
Turn over and adhere your "bumpers" to the bottom of each coaster.
Spray with the sealant, step back, and admire your awesomness!


If you decide to make these, let me know!! Comment here or shoot me an email at Sarawenzel59@gmail.com !
You will need:
6 white 4" ceramic tiles(.16 at Home Depot)
2-3 sheets of 12x12 Scrapbook paper of your choice
Home made modge podge*
Scrapbook stickers(these are optional and add a little bit to the final cost, but i decided to use them to make my coasters even more special to the person they are for)
Felt/silicone furniture pads(the silicone ones are called "bumpers" for some reason) 1/2" diameter
Acrylic sealant spray
Paper cutter
paintbrush
Cut your scrapbook paper down to size. If you have a Cricut, i suggest using that since it makes this step much quicker, but a good 'ole trusty paper cutter will do the trick if you don't have a cricut.
After the paper is cut down to size, line up your tiles.
Spread a thin layer of your "modge podge" on the tile first, carefully lay your scrapbook paper onto the tile and carefully smooth out any air bubbles. Spread another thin layer on top of the scrapbook paper, set aside to dry.
Repeat until all of your tiles are covered with the paper.
If you are using stickers, place the sicker where you want it on the tile, cover in a thing layer of "modge podge" and set aside.
Put 2 or 3 three more coats of "modge podge" on each tile, letting them dry fully before applying the next coat.
Turn over and adhere your "bumpers" to the bottom of each coaster.
Spray with the sealant, step back, and admire your awesomness!

Price break down:
Tile: 6 tiles, at .16ea. Total price : .96
Paper- 1.48(for 3 sheets)
Stickers- 2.24
Bumpers/furniture pads-3.74
Total- $8.42*
*These were more expensive because i decided to go with the silicone bumpers and stickers, i made another set without stickers and with felt bumpers, the price break down is below:
Without Stickers/silicone bumpers:
Tiles: .96
Paper: 1.00(4/$1 sale, so .25ea)
Felt pads 1.84
Total- $3.80
*How to make your own modge podge:
Pour 4oz of elmers glue into a container at least 9oz deep
Fill elmers bottle with hot water up to the top, but not over flowing
Pour into the container you poured the glue into
Stir
VOILA! Modge podge!

If you decide to make these, let me know!! Comment here or shoot me an email at Sarawenzel59@gmail.com !
Wednesday, August 17, 2011
Meatless Wednesday-Zuchini Casserole
My husband is the definition of the word "carnivore". He would be happy with steak all day everyday for the rest of his life. I, on the other hand, am more of a borderline-vegetarian, meat for the most part grosses me out and i only eat certain kinds. Most of our meals contain meat due to my husbands need for meat, but because i can't really stomach it and the baby won't touch it; i have established "Meatless Wednesdays" into my weekly meal-planning. For today's "Meatless Wednesday" i decided to go with Zucchini Casserole(sorry,no pictures today)
Ingredients
2 Summer squash,thinly sliced
2 Zucchini,thinly sliced
1bag of mozzarella cheese
4 cups pasta shells
1 sleeve Ritz crackers
Preheat oven to 350. In a large pot cook the squash and zucchini ,5-10 minutes,until tender. While the squash is cooking, cook your shells until they are al dente. In a 9x13 casserole dish layer squash,cheese,pasta and repeat, putting a generous amount of cheese on top. Bake in the oven for 15-20. Take out and cover the top of the casserole with crushed Ritz crackers and drizzle with melted butter. Cook an additional 5 minutes and enjoy!
Subscribe to:
Posts (Atom)